General description
Clean, recyclable and easy to use.
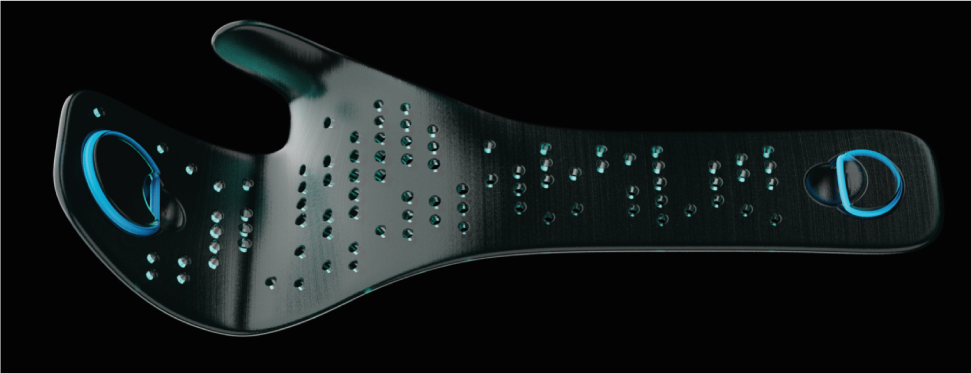
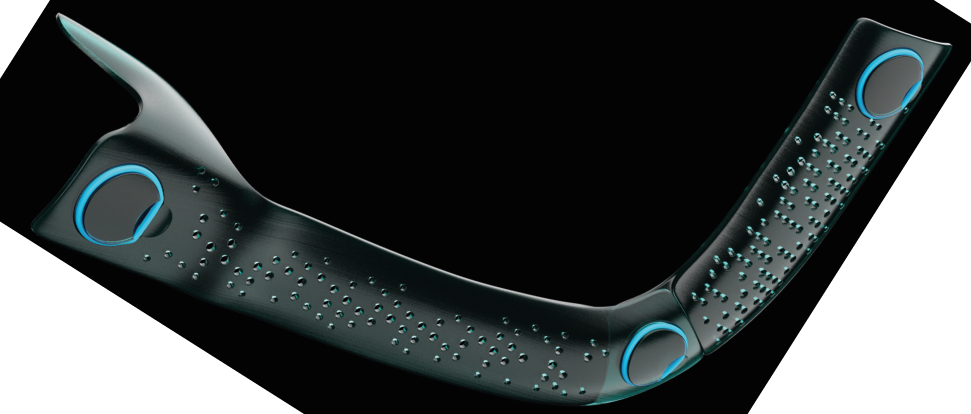
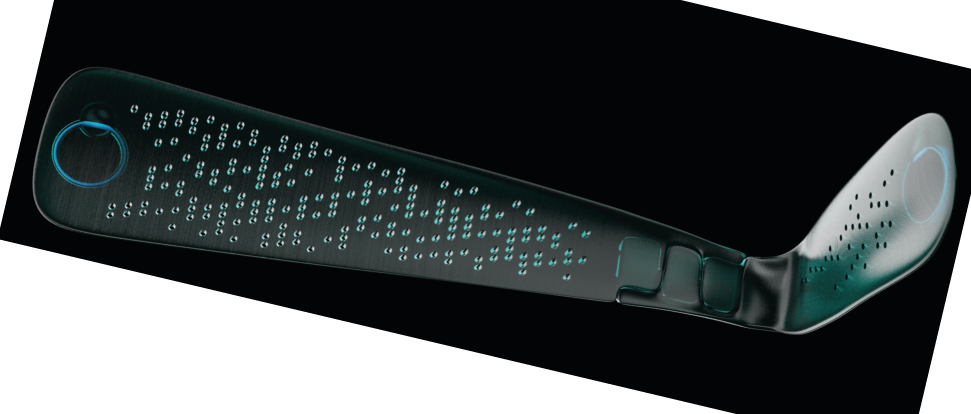
Hard splint to substitute plaster and thermoplastic provisional immobilization.
The process of immobilization remains as familiar as possible for professionals.
Add the measurement of the injured limb in to the Cloud software to generate the automatic design of the personalized IMUR.
Also facilitate the rehabilitation tasks of the physiotherapist regarding the therapies and monitoring of the wounds, in the case of post-operatorias.
Does not produce any kind of itching or irritation on the skin. Its low weight and design makes living a normal life as normal as possible.
When the patient came back to change it for the XKAST to continue the recovery.
Design specs
Benefits to use Imur.
The holes in all the immobilization helps the skin to breeaze and provide the whole of a great comfort in contact with the skin.
Reduce the problems of immobilization with traditional systems.
Improves the way how to put on and take off the immovilization.
Personalized designs for different dimensions and angles to offer the best adaptation results.
There are no deviations in the placement.
Makes the immovilization process much cleaner and faster.
Thermoformable properties
How to thermoform the IMUR after print.
1. After print and remove the supports, follow the cleaning protocol as normal (wash unit and isopropyl). And then apply the IMUR to the patient, making pressure to fix in the exact shape required. Once you have it without stop making pressure solidify the resin with standard 405 nm UV light. (Less than 1 min.)
2. Follow the process as normal, and once you remove the IMUR from the cure box apply it to the patient making pressure to fix in the exact shape required, and wait to cold down. (Less than 1 min.)
3. Take a hot pistol to warm the IMUR (300ºC), moved at the angles/position required and wait to cold down.(Less than 1 min.)
*Remember: For molding options use the new XKAST resin.
How to Bandage
Using our elastic band:
1. Place the IMUR.
2. Start making a hole (with scissors or punch paper machine with the O-ring size) in the band to fix in the first O-ring placement.
3. After put the O-ring on top to fix. Start bandaging (the first turn between the IMUR and the skin).
4. Finalize the bandage, repeat the process in the last O-ring placement.
Using standard bandage:
Place the IMUR and the bandage as usual.
Product comparison
See what the advantages are.
| COMPARATIVE The best option for you |
PLASTER & THERMOPLASTICS | ORTHOPEDIC DEVICES | IMUR |
|---|---|---|---|
| WATER PROOF | |||
| HYGIENIC | |||
| NO RISK OF INFECTIONS | |||
| NO RISK OF FUNGAL INFECTIONS | |||
| NO RISK OF SKIN ALLERGY/PATHOLOGIES | |||
| 100% CUSTOM MADE | |||
| LOW WEIGHT | |||
| COMFORT AND ERGONOMICS | |||
| LOW COST | |||
| QUICK SETUP | |||
| TRAVEL BY AIRPLANE | |||
| REUSABLE | |||
| ADJUSTABLE TO SWELLING | |||
| IMMEDIATE IMPLEMENTATION IN EMERGENCIES | |||
| USABILITY FOR: Broken bones |


